Set up your first run
The first useful goal is to reach a point where you can tell why you died. A death while boxed in, a boss you cannot damage, and a run lost while chasing a pickup are three different problems. They should lead to three different changes.
Open the original game, choose a Guest session if you are trying it out, and start with one of the three offered partners. This site does not share a save with the game. Before investing a long session, inspect the game’s account and save options so you know where your progress lives.
Keep the region, difficulty and partner the same for a few attempts. Changing all three makes it hard to learn anything from a better time. In the opening, pay attention to where enemies arrive, how your first attack reaches them, and which route remains open when a group closes in.
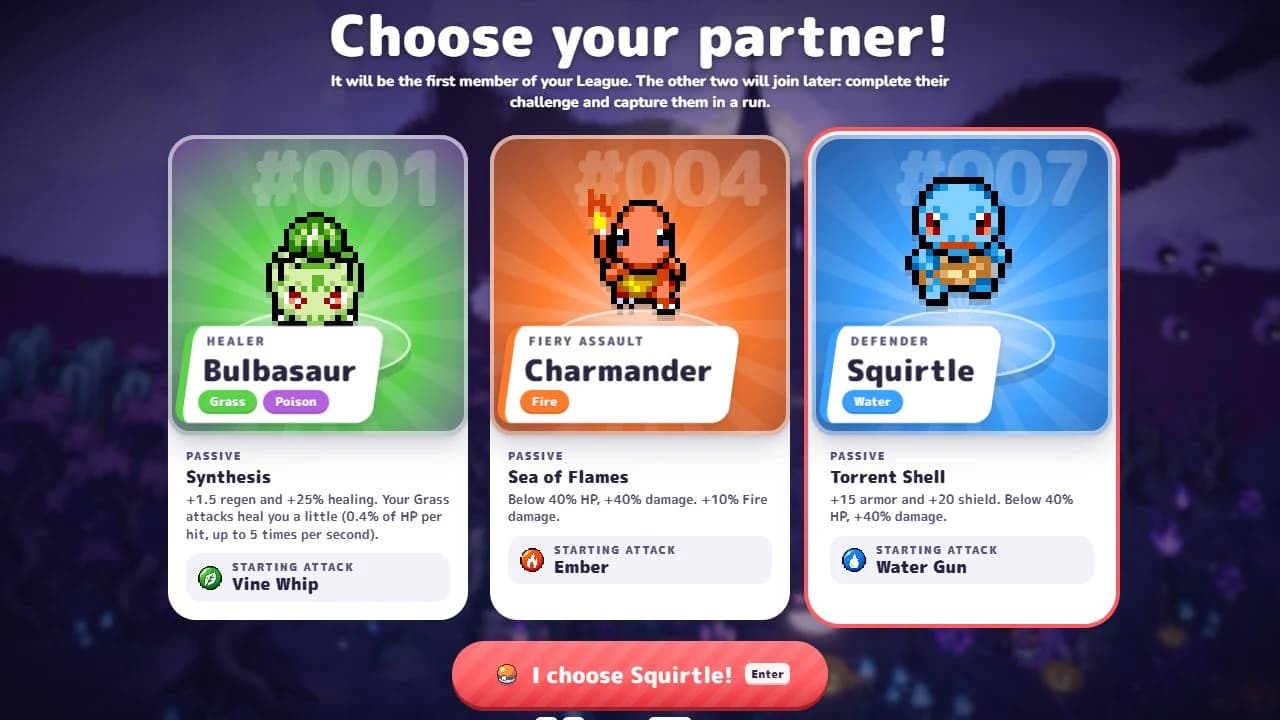
Choose between Bulbasaur, Squirtle and Charmander
Bulbasaur, Squirtle and Charmander teach different habits. You do not need to reroll your account to find a perfect start. Pick the one whose passive helps with the problem you are actually having.
Bulbasaur is a sensible first choice when repeated small hits are draining your run. Synthesis adds regeneration and healing, and Grass hits provide small, capped healing. That rewards keeping attacks connected while you create space. It does not make standing inside a crowd safe.
Squirtle gives armor and shield immediately. That is useful when learning how much room a group needs and how far a projectile travels. Charmander’s Sea of Flames increases damage below 40% HP, with a separate Fire bonus. Treat that low-health bonus as help in a bad situation; deliberately sitting at low HP is a rough way to learn an unfamiliar arena.



| Partner | Unmodified run HP | Passive to build around |
|---|---|---|
| Bulbasaur | 108 | Synthesis: +1.5 regen and +25% healing. Your Grass attacks heal you a little (0.4% of HP per hit, up to 5 times per second). |
| Squirtle | 108 | Torrent Shell: +15 armor and +20 shield. Below 40% HP, +40% damage. |
| Charmander | 104 | Sea of Flames: Below 40% HP, +40% damage. +10% Fire damage. |
Collect experience without getting surrounded
Use the default controls deliberately: WASD moves, the mouse adjusts the camera, Space jumps, and Shift slides. Check the current controls menu if your bindings differ. Press Esc somewhere safe to inspect the pause menu before an unfamiliar decision.
Make a short loop around the outer edge of a group instead of reversing into the enemies you just passed. Look beyond the nearest pickup. A pocket of experience can be collected on the next circuit; a closed exit can end the run now. The useful question is whether you still have somewhere to go after taking it.
When you take repeated contact damage, spend the next attempt watching your route rather than watching damage numbers. If the route is open but projectiles keep landing, work on camera direction and lateral movement. If the same patch of ground is causing trouble, identify that hazard instead of assuming another armor level will solve it.
Choose between moves, move levels and vitamins
A new move takes a slot. A level in a move you already own improves that move. A vitamin changes stats and takes a vitamin slot. These are separate resources, so an attractive new attack can still be the wrong choice when it blocks a planned slot.
At each offer, ask what the run lacks. If enemies survive long enough to surround you, improving an attack that already connects may help more than adding another underleveled one. If you kill safely but lose health to occasional hits, a defensive or recovery choice can protect the damage you already have.
Read the actual damage class rather than guessing from the element. A Fire-looking kit is not permission to take every special-damage offer, and a physical opening does not mean every later move is physical. The Attacks list shows the damage class, shape and level growth used in PokeBonk.
- Identify whether the offer adds a move, raises a level or modifies a stat.
- Check the slot it needs and the damage class it supports.
- Choose one reason to take it. Do not change the entire build for one attractive card.
When to start upgrading fusion ingredients
Bill’s Machine can combine two eligible moves at level 8 or above and free a move slot. It is tempting to plan every first run around a named result, but acquiring the ingredients is only half the job: both need enough upgrades, and you need to survive until the machine is useful.
Learn what each ingredient does before reserving its slot for a fusion. Attacks includes all 106 fusion outcomes: 79 signature recipes, eight reactions, 18 same-type results and MissingNo. Open the intended result to check its ingredients and learners, then decide whether those ingredients can carry the current run.
A name alone is not enough to choose a pair. Signature recipes take priority over reactions and same-type results, so check the intended outcome before spending several upgrades. Confirm the machine preview in the run, especially after a patch changes attacks or recipes.
TM Case raises normal moves from level 8 to level 10 and lets a fusion grow from ★5 to ★6. You still only need level 8 on each ingredient to fuse. Do not hold back a useful fusion while waiting for level 10, and do not make finding this Legendary item a condition for a successful first run.
Review why your run ended
After a run, make one short note: what stopped you, what your main damage source was, and what you will change. “Need a stronger build” is too broad. “Had no room to move after chasing experience” gives you something to practice immediately.
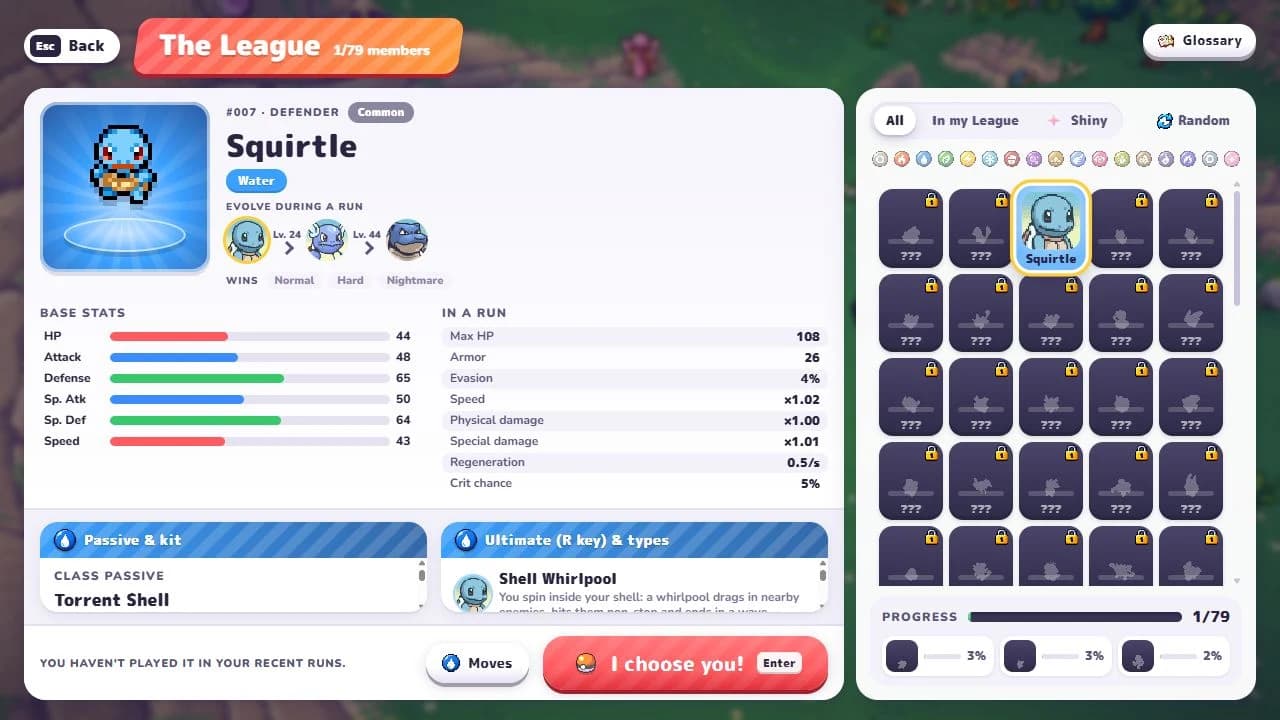
If you reached the same wall twice, inspect the Lab and locked League partners. An unlock challenge gives the next run a purpose even when a clear is still out of reach. Spend Stardust against the problem you observed; there is no need to buy the first affordable button just to leave with a purchase.
KOs, Survival and Time attack reward different things. The Global KO board adds regional bests, so playing another region can matter more than repeatedly improving one. Survival rewards time. Time attack compares completed regions before total time. Choose the mode after deciding what you want the next run to accomplish.
Favorites, Build Plan and guardian portals
A Favorite is a selection shortcut, not a stat bonus. A Mastery Look is a cosmetic challenge reward. Most of its challenges also count in co-op; challenges that limit the number of hits you may take still require solo play. Pick your partner for its passive and opening kit, then choose a cosmetic independently.
The in-game Build Plan is useful once you have a specific pair in mind. Mark the attacks you want and watch for the planned-choice labels. Marking an attack or item does not unlock it, reserve an offer or add a move slot. If an item is locked or archived, fix that in the menu before expecting it in your next attempt.
After beating a guardian, the arrow and minimap guide you to its Great Ball and then the portal. In Lavender Tower’s Beyond, Bill’s Machine appears every three floors. If you are following an older walkthrough, check the current patch before assuming a missing machine or a changed menu means the run is broken.
Check move kits, fusion recipes and Lab costs
Check a partner’s kit, compare two fusion ingredients or add up your next Lab purchase before starting another run.